Aura gas Cover Calculator

Aura gas Cover Calculator

WordpressPHPVue.Js
Aura gas were in need of an modernised version of their cover calculator that would be easy to add to any wordpress site, including their own. This would require a custom admin panel for the plugin with a large amount of functionality.

The Old Calculator

The Old Calculator

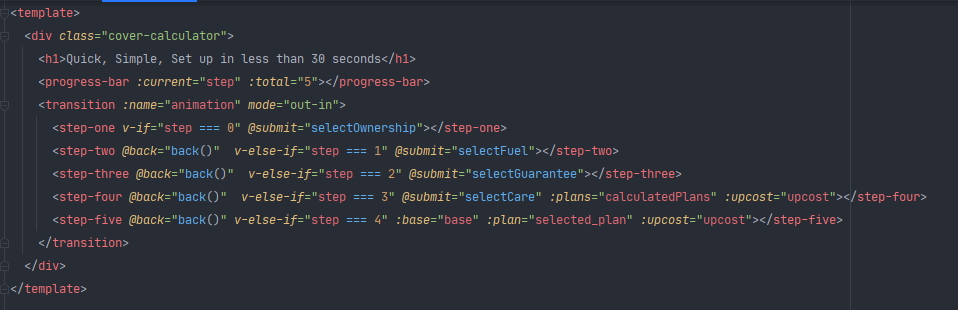
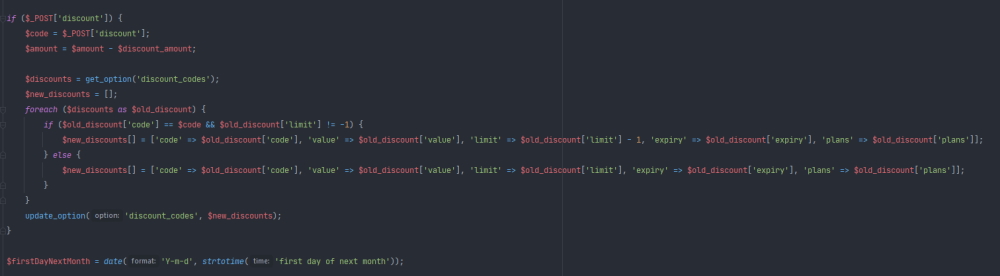
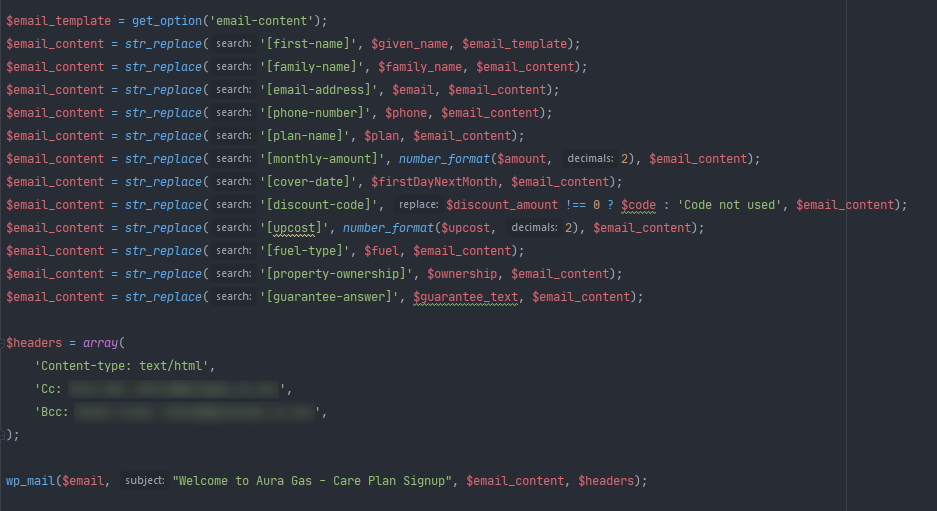
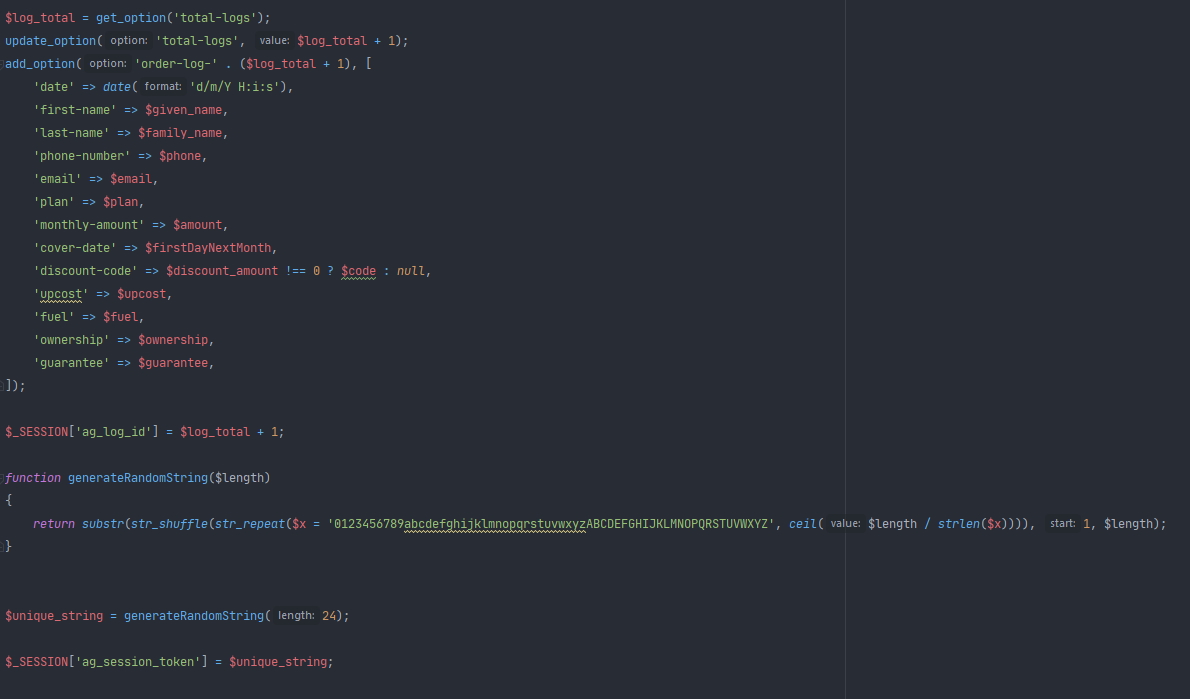
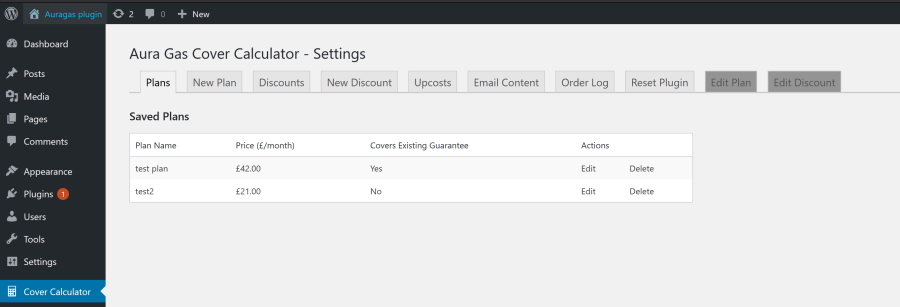
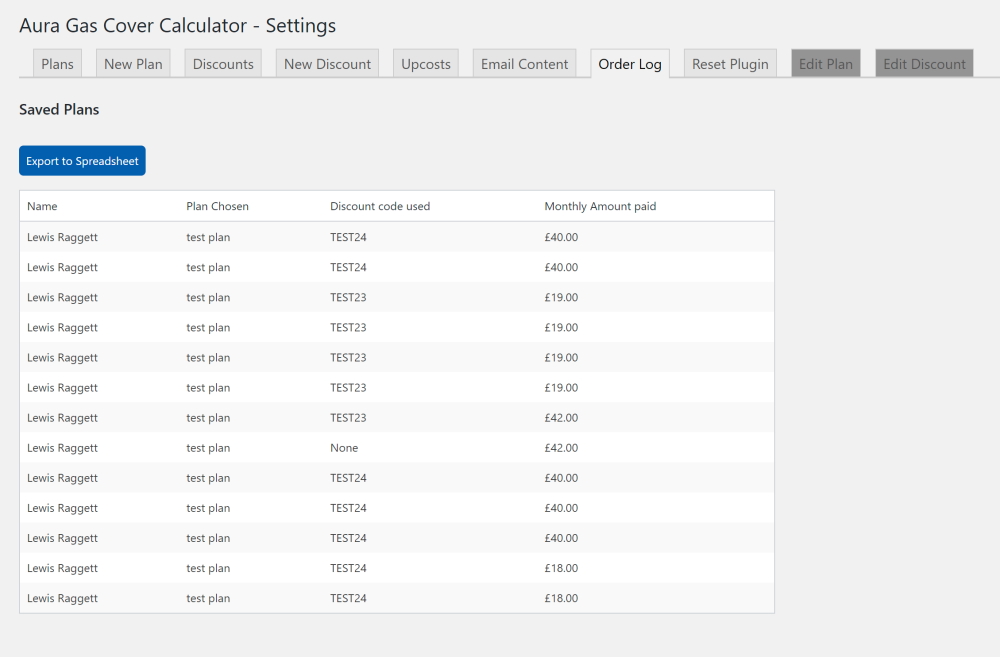
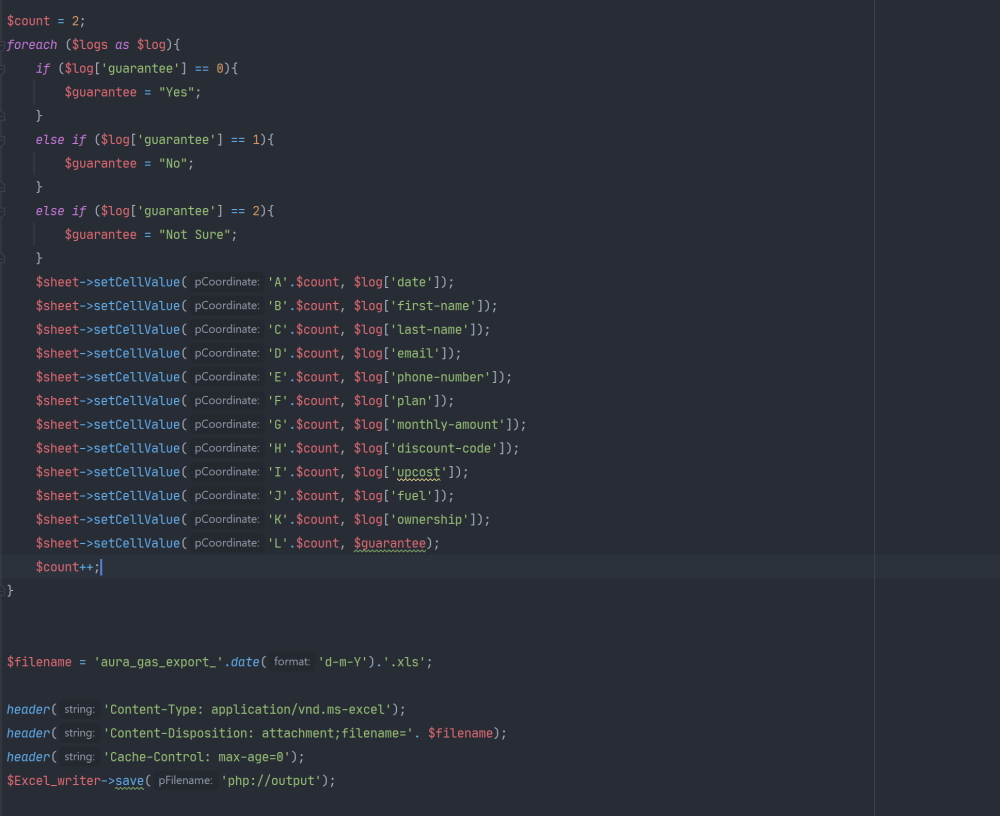
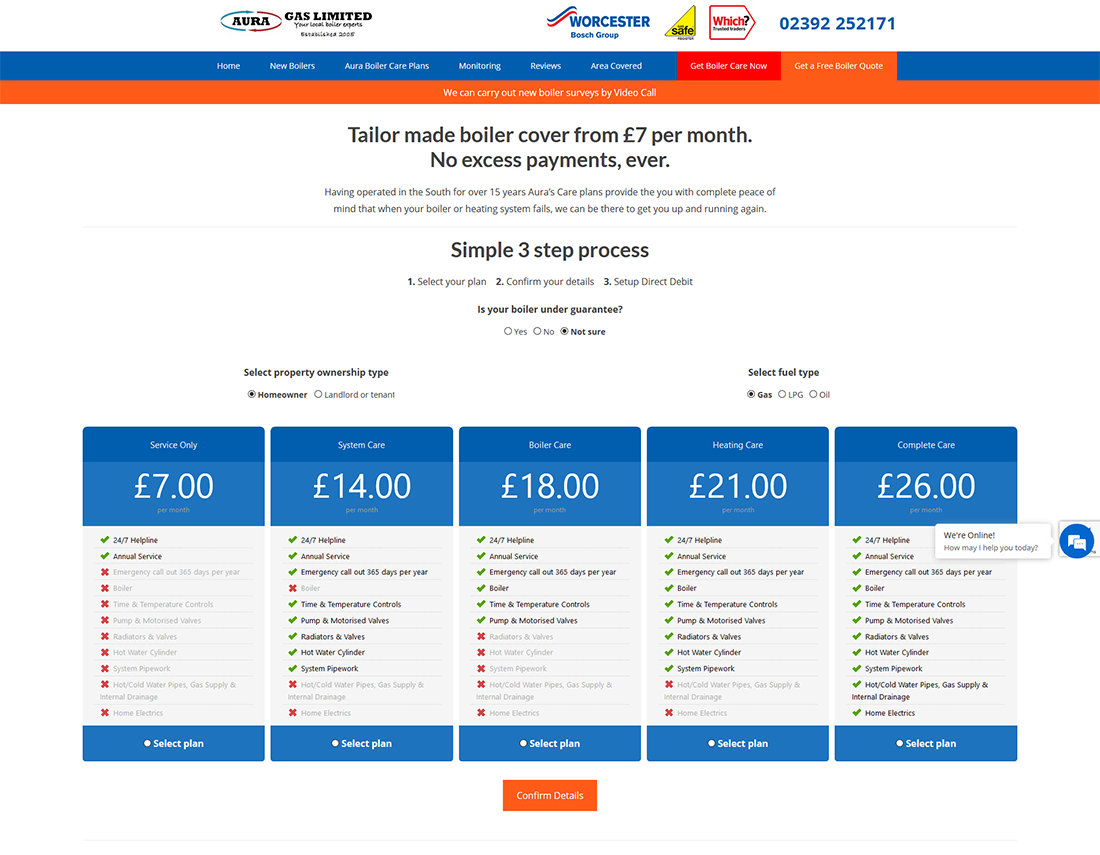
This was a project done with Sprechen, Aura gas' old calculator was a simple PHP form with some jquery to swap out the plans. Being presented with all the options at once may be overwhelming for a user and is quite an outdated way of presenting UI. Therefore, they requested an animated, step based calculator to make for a more modern, mobile orientated experience. The new calculator would need to incorperate discount codes, custom emails and should log all subscriptions succesfully put through the system. Aura gas had already been using Go Cardless as their vessle for taking payments so we decided to stick with it and avoid having to get rid of any old infastructure.
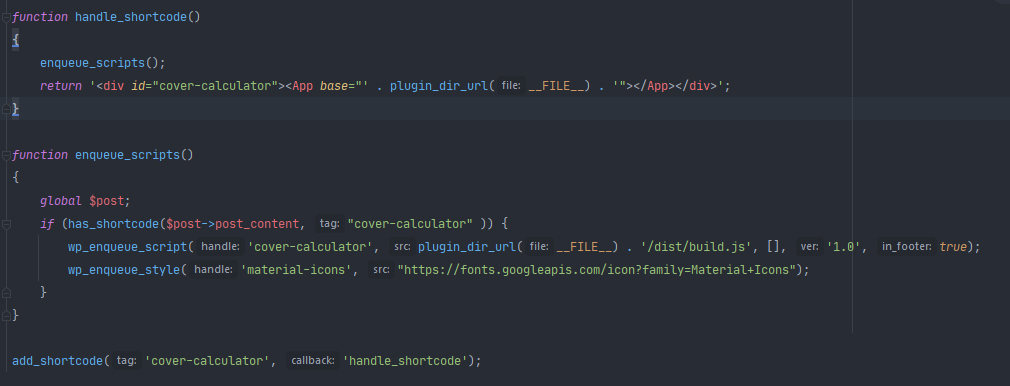
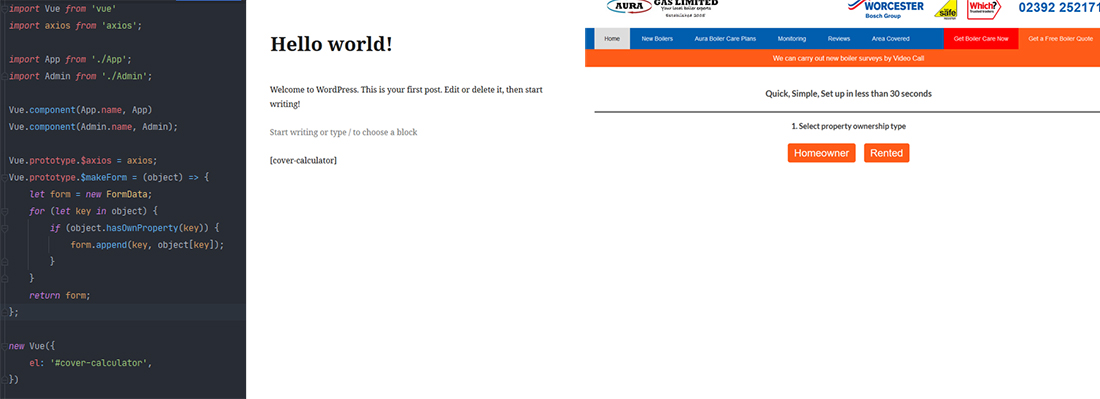
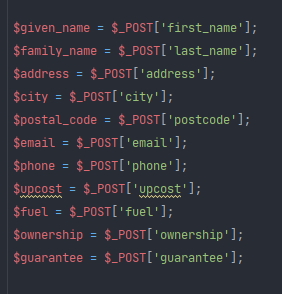
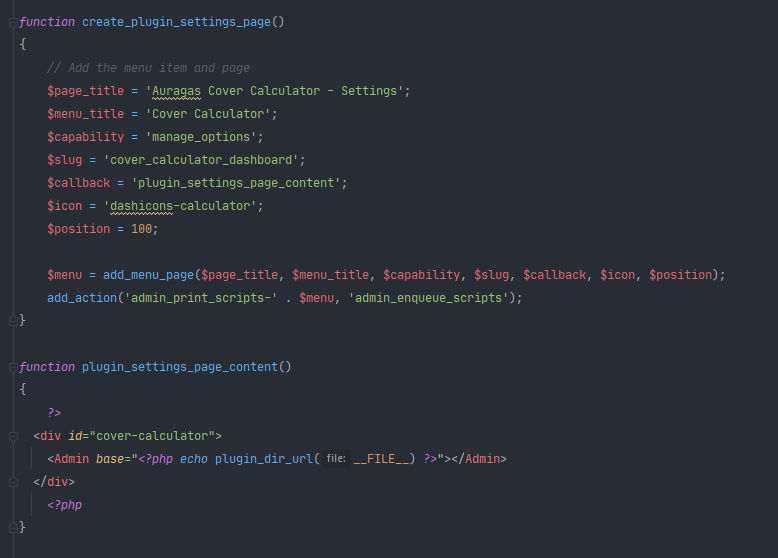
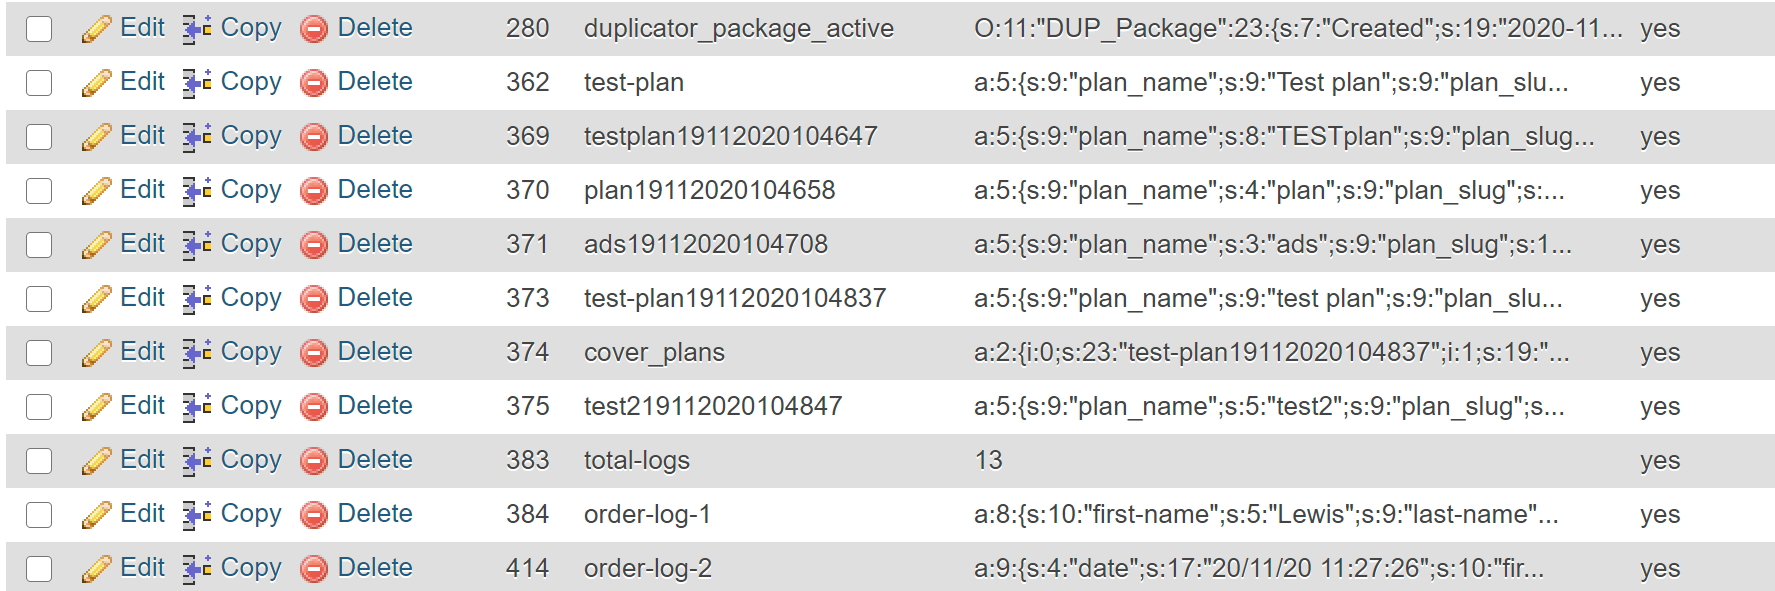
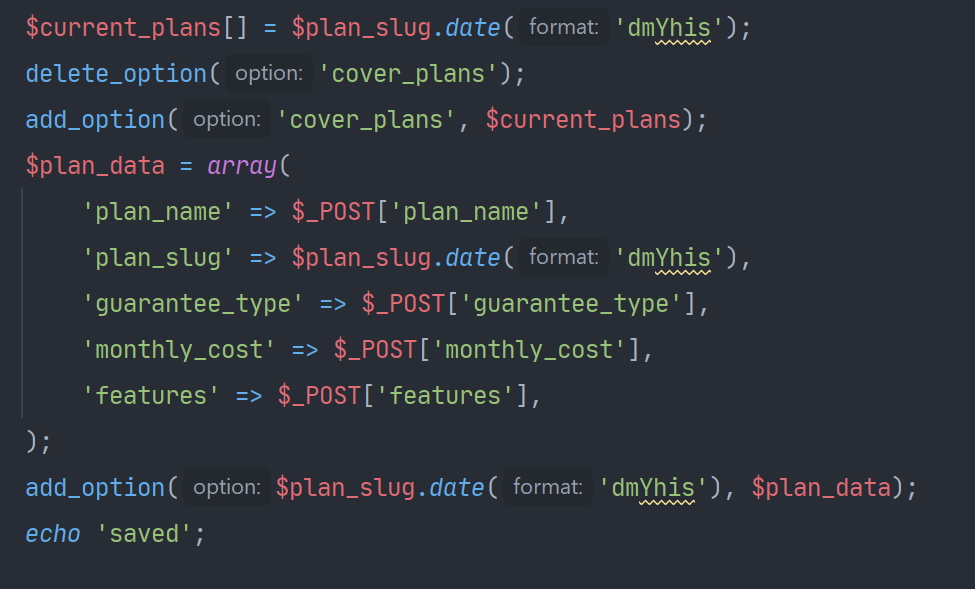
Wordpress Plugins

Wordpress Plugins

Having never worked with wordpress in this way before, creating a plugin was a learning experience for me. I started by researching how wordpress works and how to create plugins. The following resources were incredibly helpful in teaching me how to register and add functionality to a plugin.

With my new knowledge I first started off by registering a new shortcode within a php file in the plugins folder of wordpress. A shortcode is a small slug inside square brackets which when added to a post or page will be replaced with the results of running a function from the plugin. In my case, I would replace the shortcode with a div to mount my Vue.js app on as well as a trigger to include all the relevent scripts needed.

Customising the plugin

The initial plugin file includes a small block of comments at the top of the file which allows the plugin's title, description, author and other meta data to be configured, I started by changing all these details so that the plugin would appear nicely on the wp admin plugin manager.

Plugin page

Adding some Vue

Adding some Vue

When the shortcode is replaced by the plugin, the built Vue application is added as a script tag on the page to mount the app. With this base file, I could import as many components as I needed to make the full calculator.

The App

The way in which the app works is very similar to Donater which you can read about here. To summarise, each 'page' of the calculator is its own Vue component which are swapped out by a parent app container. Each component asks the user a question and emits the response back to the parent to store for coming stages. Once the data has all been collected, it can then be sent to php files which interact with wordpress' database.

The API

The API

Most of the interaction with the wordpress database is done through a meriad of php files which I have stored in an api folder. I also went on to organise them in a very laravel-esc way by splitting them into 'resources' which have individual files for each action such as creating, updating or retrieving items. Laying it out this way is a lot more scalable and organised than it would be to include all functions in a simple file and makes debugging more simple.

Go Cardless intergration

Go Cardless intergration

When the calculator has finished collecting data, it sents it to a file called 'redirect' which handles the Go Cardless redirect along with logging the transaction and sending a confirmation email.

It starts by including wordpress' built in functions such as 'get_option' and 'update_option' which handle database interaction as well as importing the vendor autoload file which lets the file use dependencies installed by composer.

The file then initiates a Go Cardless client which can be used to access the Go Cardless methods such as creating transactions, customers and subscriptions. At the start of the file, it also creates a session which allows for data to be stored in browser storage so that the transaction can be confirmed after the Go Cardless redirect.

Getting post variables

To make things easier later on when processing data, it then assigns posted data to readable, memerable variables.

Discounts

Next up is handling discounts and updating the remaining uses on one.

If a discount has been entered in the last step of the calculator, all discount codes are retrieved from the database, the file then loops through them all to find the listing for the code used. If the code has a limit other than -1, it decreases by 1 and then is saved back to the database. This is so discount codes can have a limited amount of uses rather than all being unlimited.

Sending emails

Then, an email needs to be sent to both Aura gas and the customer, this is done by taking the email template that was created in the calculator admin panel and replacing all of the shortcodes used with their relevent value. The email is then sent to relevant parties using the wp_mail function which makes use of wordpress' mailing function.

Logging data

Next up is logging the transaction. This is done by creating a json object with all of the attributes related to the transaction. These are then stored under a wordpress option with an id. Another option is used to keep track of the total number of logs so that it is easy to add an id for a new log. At this point, a random string of characters is created and added to the browser session variables to that we can verify whether it is the same transaction being referenced after the Go Cardless redirect. The log number is also stored so that data can be retrieved about the transaction after the redirect.

Redirect

Finally, a redirect url is generated by the Go Cardless client object we made with customer details that we can pass on to the Go Cardless details form. At this point, it also takes note of the redirect flow id and stores this in session data. The script then ends and the user is redirected to the Go Cardless client.

Calculator Walkthrough

Confirmation

Confirmation

After the redirect is succesfully submitted by the user, they are sent to a thanks page. This page needs a second shortcode defined in the plugin as [cover-calculator-confirmation]. This shortcode simply executes another php script. This script looks at the session data and gets the session id, session token and log id that the redirect script set earlier. It then takes theses values and uses them to firstly complete the redirect flow and use the generated customer to create a subscription with their card details with the monthly amount taken from the log. At this point, the cover plan subscription has now been fully set up and the user can leave the page.

Admin panel

Admin panel

The cover calculator does require some configuration, for example, the plans, email template and changes in price depending on a user's answers. The best way to add this functionality is to create a page in the wordpress admin area. To do this, we can use the add_menu_page wordpress function and add in the page's content using the 'callback' parameter. In this case, i'm again mounting a target div for vue so that I can make use of vue functionality in the admin panel.

Admin design

When designing the admin panel, I decided to style it to fit with other plugins and wordpress UI. This way it would look natural as an inclusion and gives a more professional bespoke feel. Following suit, I would use a tab layout which Vue handles by swiching out components based on an 'active' variable which is changed every time a tab is clicked.

Wordpress' database

Wordpress' database

Wordpress uses its database in a very firebase-esc way where it stores 'options'. Options are rows in the data table which have a name and data field. This means rather than storing similar items in seperate tables, data is mostly stored as JSON with a name to find it with. Therefore, for things like the cover plans, to make data searching faster, I first created an option storing a list of each plan name and then each plan's data is stored under that name.

Saving data

To create a plan, I used simple php post forms, and sent the data to a create.php file. This file would first get the plan name and add it to the cover_plans array in the database. It would then create a JSON object using the variables from the request and saves this to an option under its name. This way, data about a plan can be retrieved and decoded easily.

Exporting logs

Exporting logs

The logs which were saved before are shown in the logs section of the admin panel in a table. There is an export button which links the page off to a seperate php file which pulls all of the logs from the database and uses the PhpSpreadsheet package to write the data to an .xls file, a more usable format for the client. To write to a file, first the headers need to be written on row one manually and afterwards the code can loop through all of the logs and write relevant data to each column. Once the loop has been finished, the excel file is then returned as a download.

Export code